How to Set Windows Update Bandwidth Limit To Download & Upload Windows Updates In The Background On Windows 10/11?
Windows 10 / 11 users get a new cumulative update almost every week. To be specific, you can expect a new update every Tuesday. Microsoft calls it “Patch Tuesday“.
When there is a new update, Windows automatically downloads and installs it in the background. While downloading, Windows will use all the available bandwidth to download the update as soon as possible. However, the “Delivery Optimization service” built into Windows can limit “Windows Update bandwidth usage” if you are actively using the internet.
The problem is that the automatic Delivery Optimization settings might not be enough in all situations leading to a degraded internet experience when the updates are being downloaded or uploaded.
Via Windows Settings App ?
You can use the built-in delivery optimization feature to set and control Windows Update download and upload speed.
- First thing, open the Settings app on your Windows system. You can use the “Windows logo key + I” keyboard shortcut or open the Start menu and click the “Settings” icon for that.
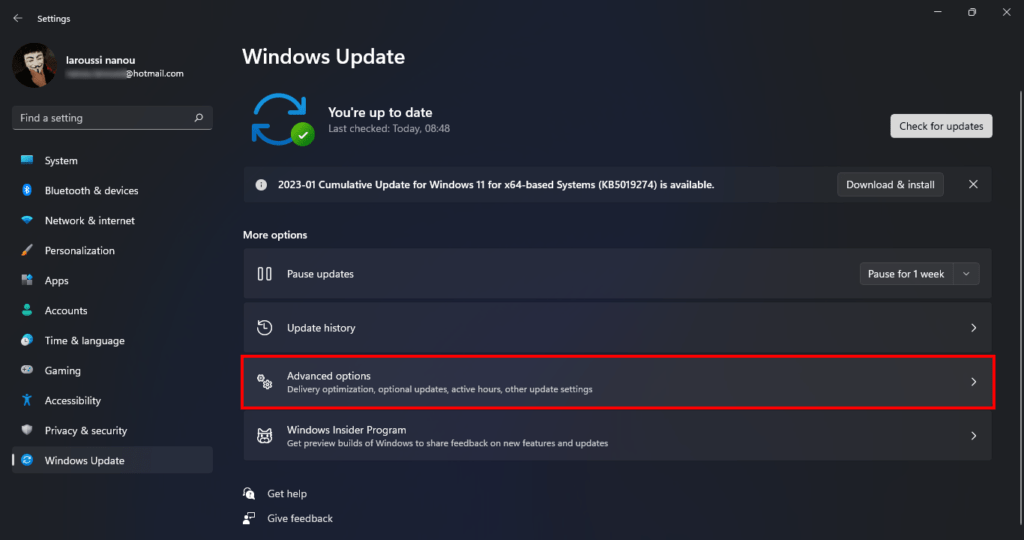
- Once the Setting app opens, select the “Windows Update” option on the sidebar. As the name implies, this is the page where you will find all the options related to Windows Update. Next, click on the “Advanced Options” option on the main page.
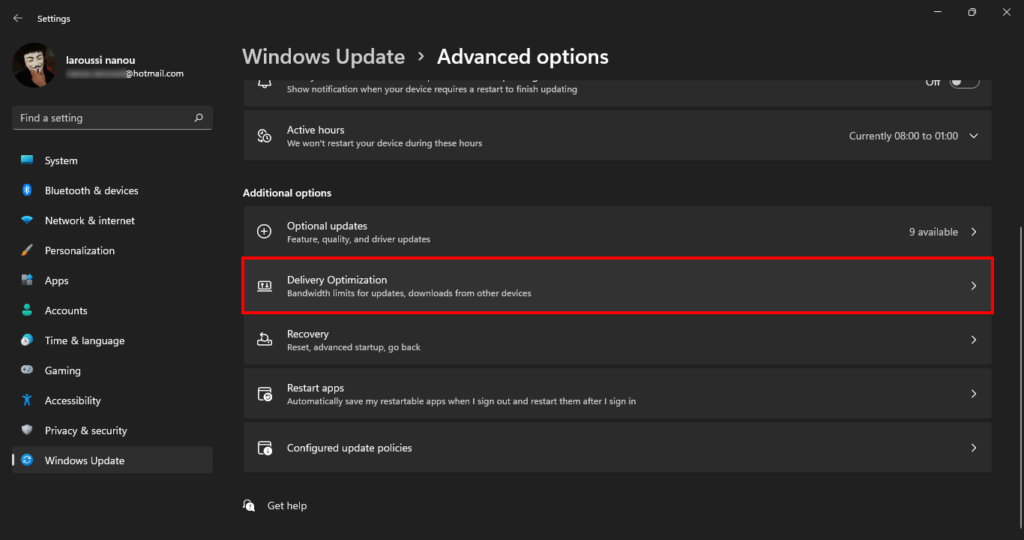
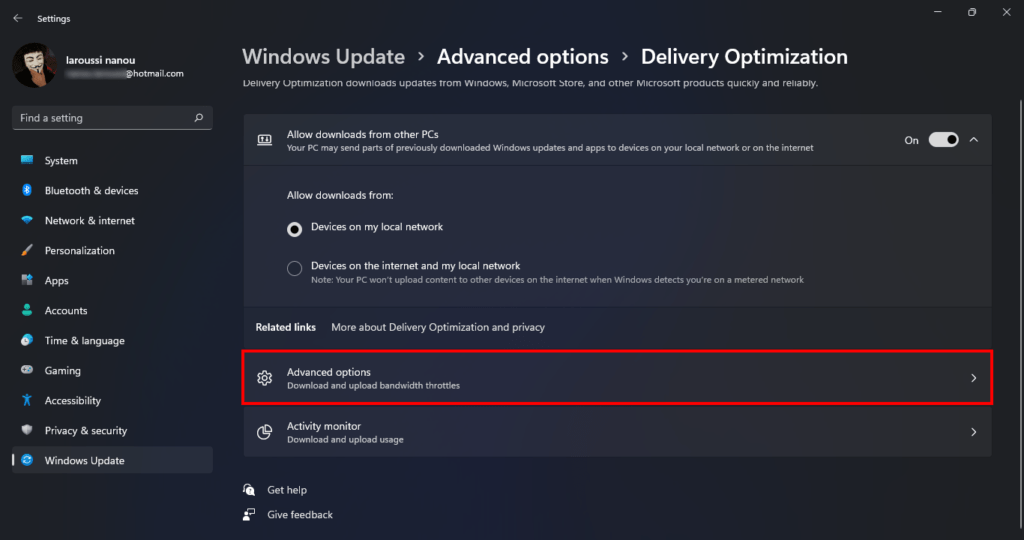
- Here, find and click on the “Delivery Optimization” option.
- The ability to control Windows Update bandwidth is an advanced feature, so click on the “Advanced Options” option.
Under the “Download Settings” section, you will see two main options. They are :
- Absolute bandwidth : This lets you set an absolute limit regardless of the available bandwidth. For example, if you want to limit Windows Update to 5 Mbps, you can use this option.
- Percentage of measured bandwidth : This lets you set the limit in the percentage of the measured bandwidth. For example, you can allow Windows Update to use 20% of the available bandwidth. Do keep in mind that Windows determines the overall available bandwidth. So the amount of bandwidth used by Windows updates may vary depending on your internet connection speed.
Select the “Absolute bandwidth” option. After that, select the “Limit how much bandwidth is used for downloading updates in the background” checkbox and set the bandwidth in the available field.
- Next, select the “Limit how much bandwidth is used for downloading updates in the foreground” checkbox and set the bandwidth in the available field.
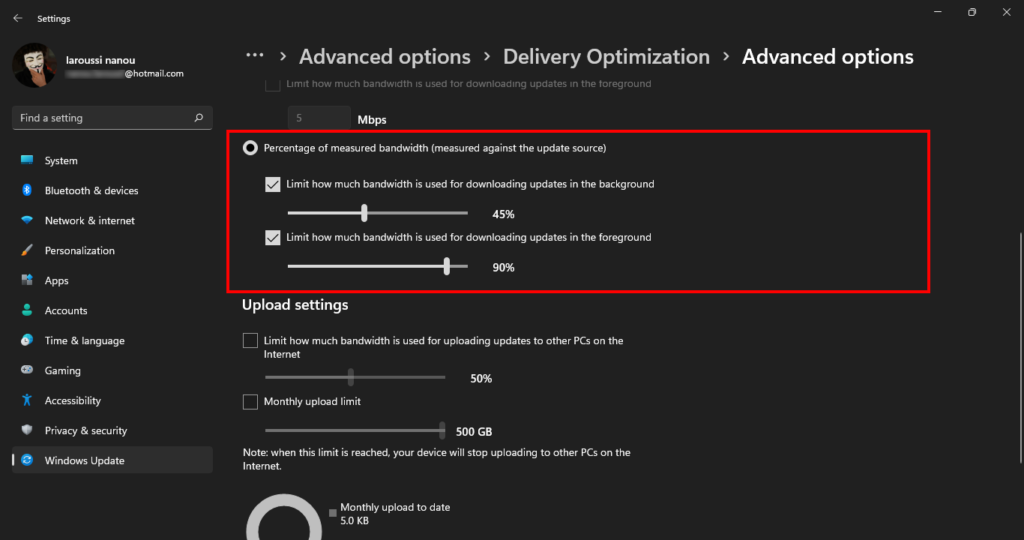
If you don’t want to set hard limits, you can select the “Percentage of measured bandwidth” option and use the sliders to Windows Update bandwidth limit. One thing to keep in mind is that Windows will automatically test and determine the available bandwidth. You have no control over it. That is one of the reasons why I recommend you stick with the “Absolute bandwidth” option.
Finally, close the ‘Settings app’ and restart your computer. After restarting, the ‘Windows Update bandwidth limit’ is applied, and the update process no longer hogs all the available bandwidth.
Via Windows Group Policy Editor?
If you are using Windows “Pro” or “Enterprise” edition, you can limit Windows Update download speed using the “Group Policy Editor“.
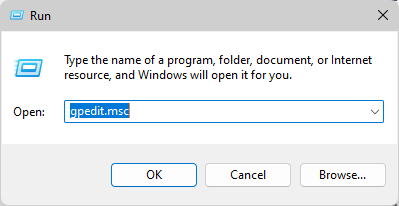
- To open the “Group Policy editor” on your Windows device, press the “Windows + R” keys on your keyboard, type “gpedit.msc” in the blank field, and press “Enter.” This will launch the “Group Policy Editor“, which is a tool that allows you to view and modify the group policies that control the behavior of your device.
- After opening the “Group Policy”, go to the “Computer Configuration/Administrative Templates/Windows Components/Delivery Optimization” folder. This folder contains all the policies to manage and configure the “Delivery Optimization” feature.
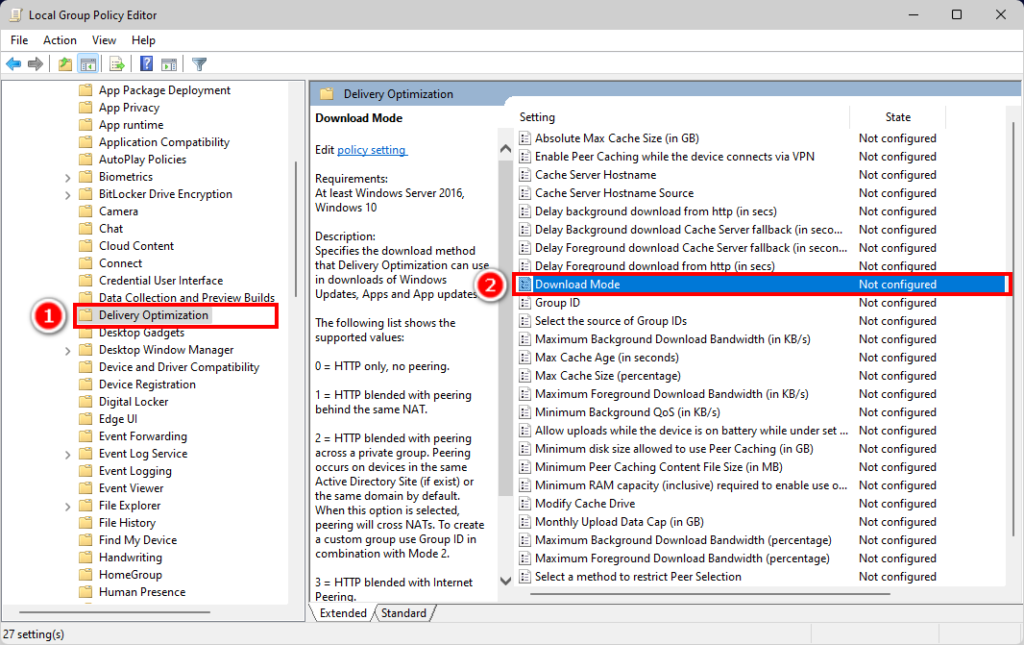
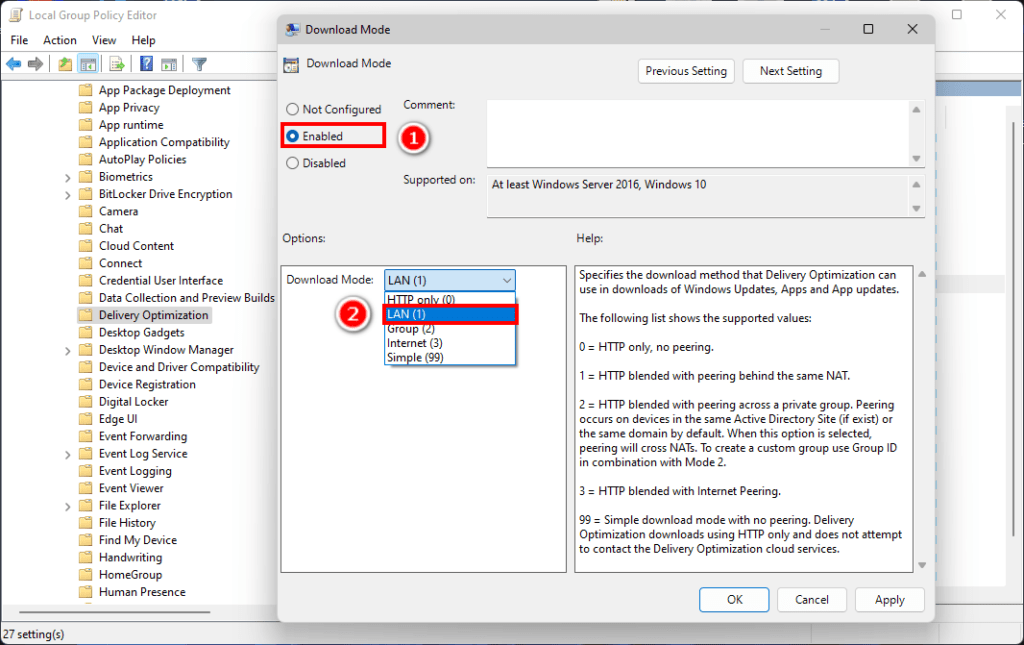
- Once you are here, find and double-click on the “Download Mode” policy. After opening it, select the “Enabled” option and then choose “LAN (1)” from the “Options” dropdown menu. Press the “Ok” button to save changes.
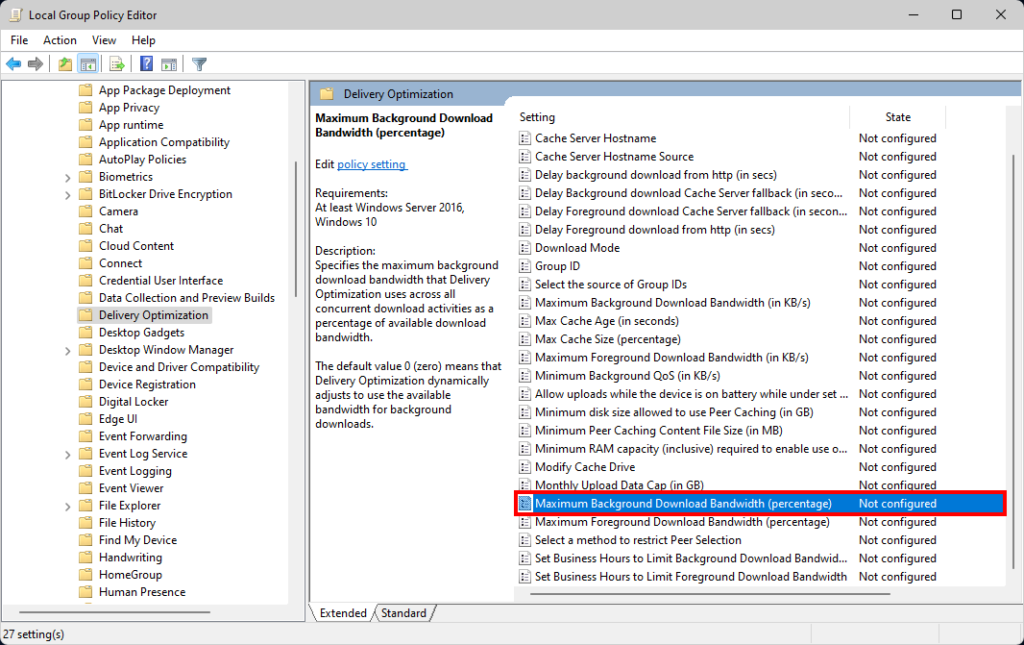
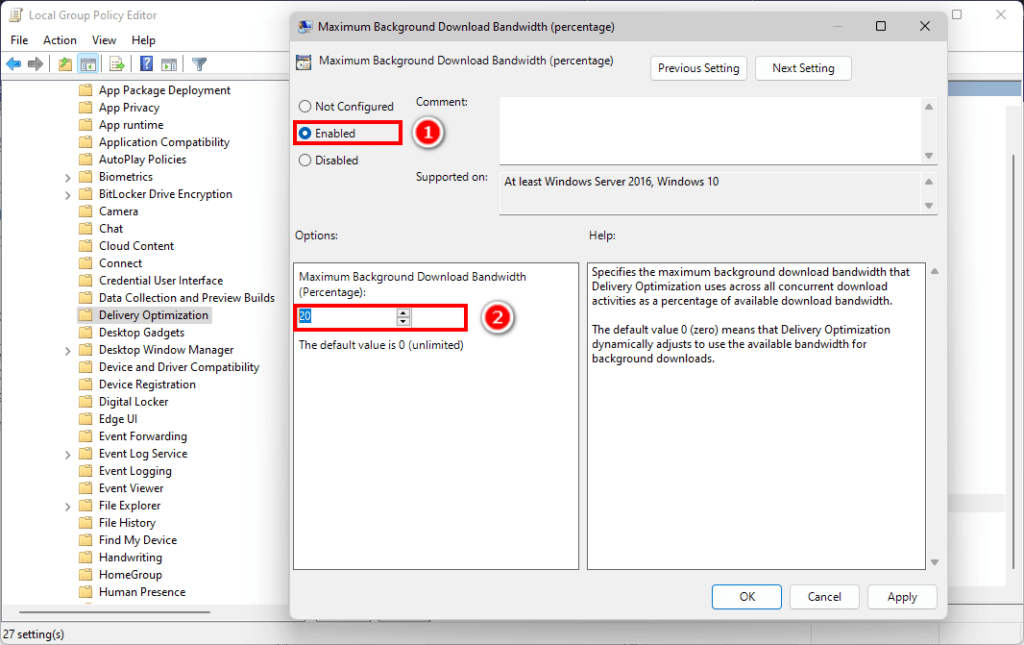
- Now, find and double-click on the “Maximum Background Download Bandwidth (percentage)” policy. Select the “Enabled” radio option, and set the percentage you want to allow Windows Update to use on the “Options” field. Press the “Ok” button to save changes.
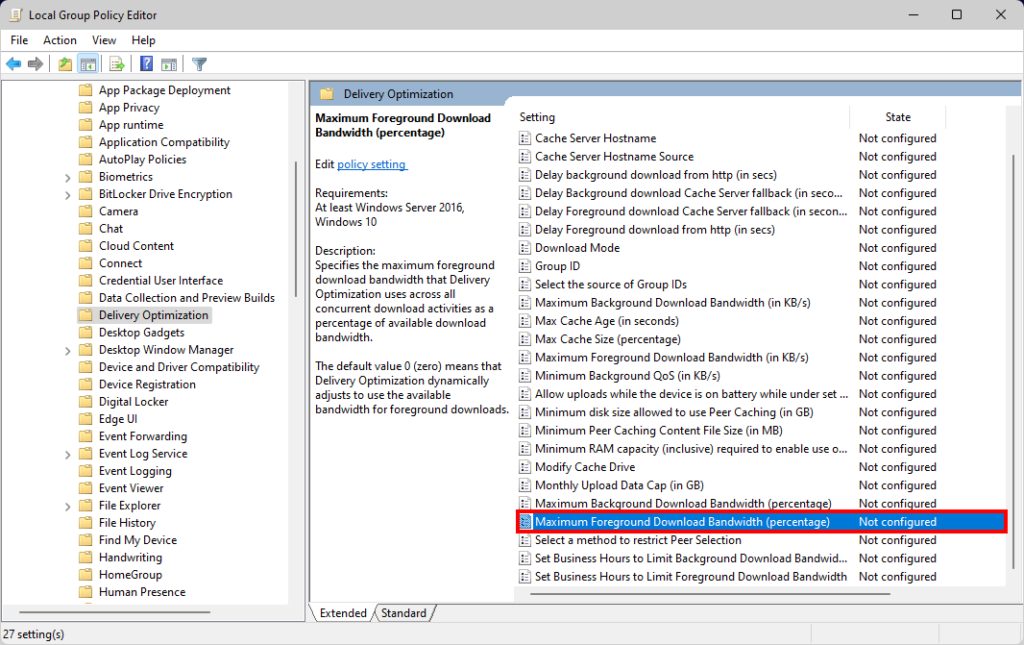
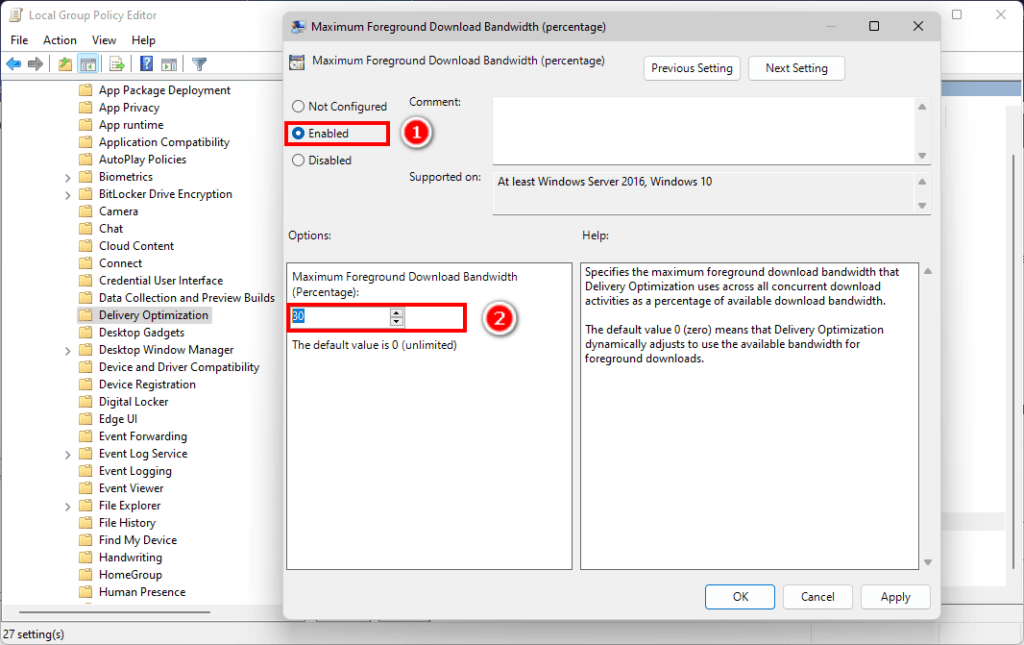
- After that, find and double-click on the “Maximum Foreground Download Bandwidth (percentage)” policy. Select the “Enabled” radio option, and set the percentage you want to allow Windows Update to use on the “Options” field. Press the “Ok” button to save changes.
- I’m allowing Windows Update to use “30%” of the available bandwidth to download updates.
Finally, close the “Group Policy Editor” and reboot the computer. Once the system is rebooted, the Delivery Optimization service enforces the Windows Update bandwidth limit.
Take a Backup: If you are willing to try the above tool, then please take a backup of your personal data from your Android Smartphone or Tablet. As flashing any Firmware or recovery may brick the device.
Credits: The Tool is created and distributed by the developer. So, full credits go to the developer for sharing the tool for free.